
Apple has announced the next major release of macOS at WWDC 2020. Available today in developer beta and coming to all users in fall 2020. macOS Big Sur will be a free software update later this year. In the meantime, the developer beta is available on https://developer.apple.com/macos/ and for public beta in July.
This OS has new features that include an all-new iOS inspired design, Control Center arriving for Mac, a revamped Safari with greater privacy controls, Apple’s new translation software that uses on-device processing, and more.
Macs compatible with macOS Big Sur (macOS 11):
- 2015 and later MacBook
- 2013 and later MacBook Air
- Late 2013 and later MacBook Pro
- 2014 and later iMac
- 2017 and later iMac Pro
- 2014 and later Mac mini
- 2013 and later Mac Pro
And Accordingly, the following models capable of running macOS Catalina will not be able to be upgraded to macOS Big Sur:
- 2012 and Early 2013 MacBook Pro
- 2012 MacBook Air
- 2012 and 2013 iMac
- 2012 Mac mini
Tip: before reading the rest of the article, it’s recommended to navigate to the Required File section of this post and download macOS Big Sur then you’ve time to read the item until the downloading gets complete.
Steps to Install macOS Big Sur on VirtualBox on Windows
- Install VirtualBox on Windows PC
- Install/Update VirtualBox Extension
- Create a New Virtual Machine & Customize it
- Run VirtualBox Code to the Command Prompt
- Start the Virtual Machine
- Perform Clean Installation of macOS Big Sur
- Summary
Important Note:
Before we get started, make sure your system can support Virtualization Technology (VT), and it is enabled from BIOS so that you should be able to run Virtualization software like Virtualbox or VMware. Also, you should have a 64-bit Windows operating system with at least 2 GB Ram and 20 GB of free storage, however, we recommend you at least 4 GB of RAM or higher so you can store more files and install more apps on macOS Big Sur.
Furthermore, if you have an SSD, it’s highly recommended to use it as storage because SSD is much faster then mechanical hard drive (HDD ) and macOS run on SSD very smooth. Anyway, it is not 100% compulsory but if you have, don’t hesitate to use it.
Required Files
- Download Virtualbox
- Download Virtualbox Code
- macOS Big Sur Beta 11.0 (20A4299v) Dev Beta 1
- macOS Big Sur Beta 11.0 (20A4300b) Dev Beta 2
- macOS Big Sur Beta 11.0 (20A5343j) Dev Beta 4/Public Beta 1
- macOS Big Sur 11.0.1 (20B29) Initial public release Latest
Note: You can create macOS Big Sur ISO Image.
Recommendation: It’s highly recommended to create a new drive on your Windows PC and install macOS Big Sur on that drive.
Step 1: Install VirtualBox on Windows PC
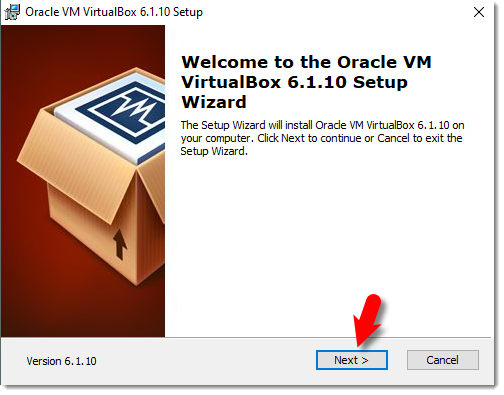
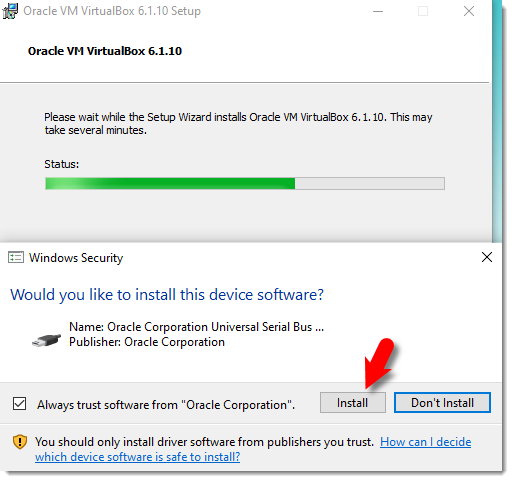
From the “Required File” section of this post, you should have downloaded VirtualBox as well and if you didn’t, download VirtualBox’s latest version and install it on your Windows system. If you’ve already installed VirtualBox, then you can skip this step. Other than that, double click on VirtualBox Setup and click Next for a couple of times and you’re done with the installation.
Step 2: Install or Update VirtualBox Extension
This step is not 100% percent necessary but it’s highly recommended to do this step because macOS Big Sur might not be compatible with VirtualBox and for this reason, it will cause a problem during the installation. Download VirtualBox Extension and follow the steps below.
#1. Open up VirtualBox, navigate to Tools>Pereferences>Extensions.3
#2. Click on Plus icon and select VirtualBox extension which you’ve downloaded at the beginning of this section. Click Install or Upgrade and then click OK button.
#3. Finally, you should see something like the screenshot below.
Step 3: Create a New Virtual Machine & Customize it
Creating a virtual machine for macOS Big Sur is the same when you create a virtual machine for the Windows Operating system or Linux. We will use the ISO image of macOS Big Sur to do the installation process.
Note: We’ll make the VMDK as well if we receive lots of requests for that. Otherwise, there is no point because you can install macOS Big Sur with iso image as well.
#1. Open up your VirtualBox application and click New.
#2. Type a name for your Virtual Machine. Click Expert Mode and choose the following options then click Create.
- Name the VM
- Virtual Machine Location (a separate drive is recommended)
- Type (Mac OS X)
- Version (Mac OS X 64-bit)
- Memory 4 GB (recommended 8 GB or higher)
- Create a virtual hard disk
Once you’ve created and customized your virtual machine, it’s time to run some codes in order to install macOS Big Sur on VirtualBox.
First, you should notice your virtual machine name because later on, we will use it. Open the VirtualBox code which you should have downloaded from the Required File section of this post.
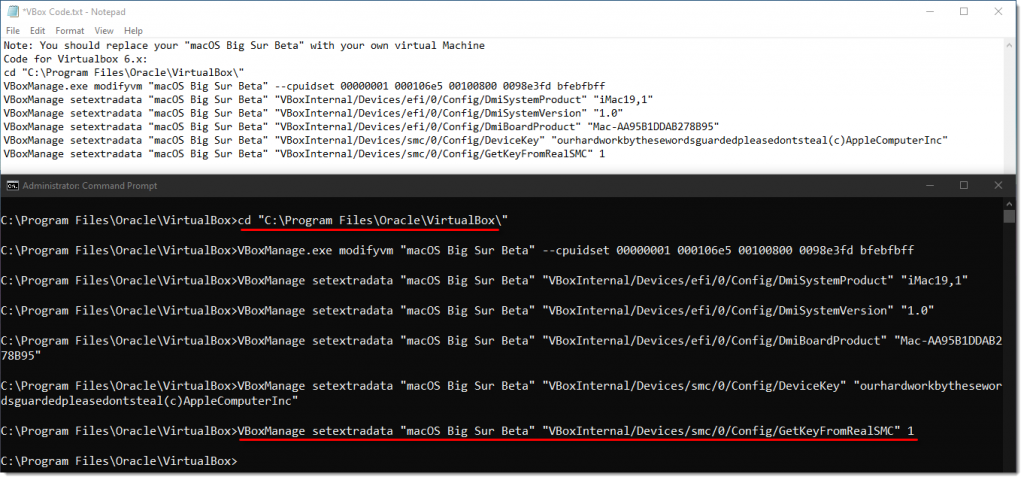
#1. When you opened VirtualBox code via notepad or any other text editor, use the replace function of the program to replace the VM Name to your virtual machine name. See the picture below to get an idea of how it’s done.
cd "C:\Program Files\Oracle\VirtualBox\"
VBoxManage.exe modifyvm "VM Name" --cpuidset 00000001 000106e5 00100800 0098e3fd bfebfbff
VBoxManage setextradata "VM Name" "VBoxInternal/Devices/efi/0/Config/DmiSystemProduct" "iMac19,1"
VBoxManage setextradata "VM Name" "VBoxInternal/Devices/efi/0/Config/DmiSystemVersion" "1.0"
VBoxManage setextradata "VM Name" "VBoxInternal/Devices/efi/0/Config/DmiBoardProduct" "Mac-AA95B1DDAB278B95"
VBoxManage setextradata "VM Name" "VBoxInternal/Devices/smc/0/Config/DeviceKey" "ourhardworkbythesewordsguardedpleasedontsteal(c)AppleComputerInc"
VBoxManage setextradata "VM Name" "VBoxInternal/Devices/smc/0/Config/GetKeyFromRealSMC" 1Tip: It’s highly important that you should quit the VirtualBox program before executing the code. If you don’t do it, your virtual machine might not proceed to the installation step.
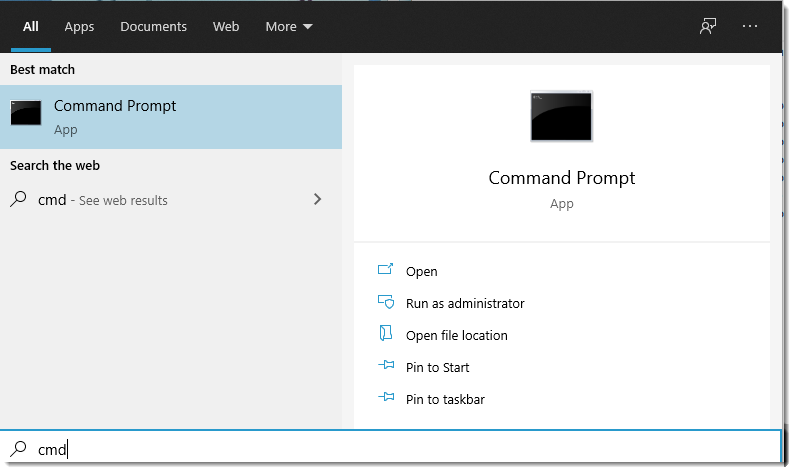
#2. Once you replaced the “VM Name” with your virtual machine name, then run the code one by one to the command prompt (CMD). You can open the command prompt by pressing Windows+X key in Windows 10 or click windows key and type CMD and run command prompt as administrator.
Step 5: Start the Virtual Machine
Starting macOS Big Sur with the older version of the Mac Operating system was a bit different, but with new macOS Big Sur still, it’s easy to set it up.
#1. Open the VirtualBox app then click the Start button. A black screen with a few yellow & white text will appear on the screen.
#2. Once you started the VM then you’ll see some code running in the background. Just wait until you see the Apple logo.
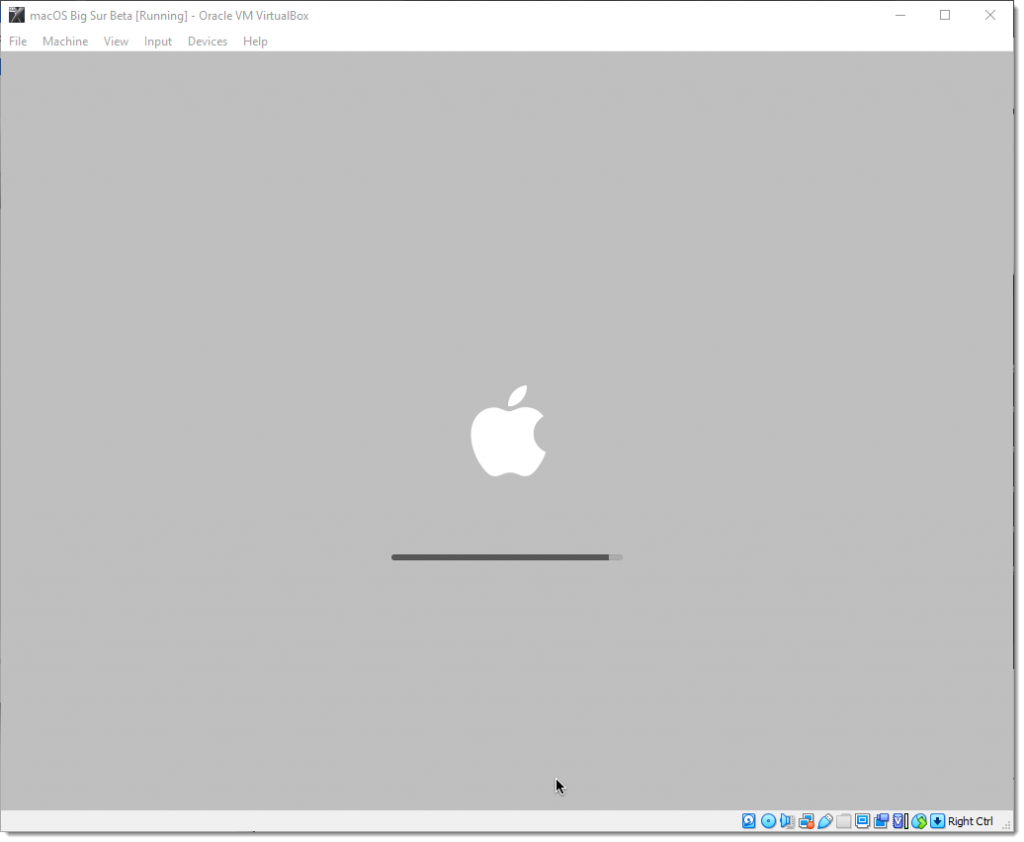
#3. Select a Language and click Continue arrow.
#4. Select Disk Utility and click Continue.
#5. Select your main Virtual Disk and click the Erase button. Make sure to check the size of the disk and you should not erase the wrong disk.
#6. Name your Disk that you want to install macOS Big Sur on it. I’ll name here macOS HD. Once typed a name then click the Erase button.
#7. Close Disk utility.
#8. Select Install macOS and click Continue.
#9. Click Continue.
#10. Agree to terms and Conditions.
#11. Select the installation disk and click Continue. Once you click continue it’ll take around 29 minutes to complete the first part of the installation.
NOTE: If you get the Operation Couldn’t be Completed BiErrorDomain Error 3 then follow this step by step guide below.
Fix the Operation Couldn’t be Completed BiErrorDomain Error 3
This is a very common error with macOS Big Sur beta version 1 that most people have faced. Just use our VirtualBox code and it should work without any error.
Step 6: Perform Clean Installation of macOS Big Sur
- Once you hit enter, a whole bunch of code will run on the screen, but you should not worry about it. Wait for a few minutes, and you should see the macOS Big Sur installation window. Have a cup of coffee until the installation complete because it’s going to take around 29 minutes to finish.
- Once the installation part complete, your system will reboot, and after the restart, you should see macOS Big Sur Welcome page.
- Select the following options. You can change most of the settings later on, so don’t worry about that for now.
- Select your Country and click Continue.
- Choose a Keyboard Layout and click Continue. If you don’t agree with preset options then you customize it. Just click Customize Settings.
- You can turn on the Accessibility features now with macOS Big Sur. You’ve several options with accessibility like vision, motor, hearing, and cognitive. If you don’t want to set up right now just click Not Now button to skip them.
- Read Data & Privacy and click Continue.
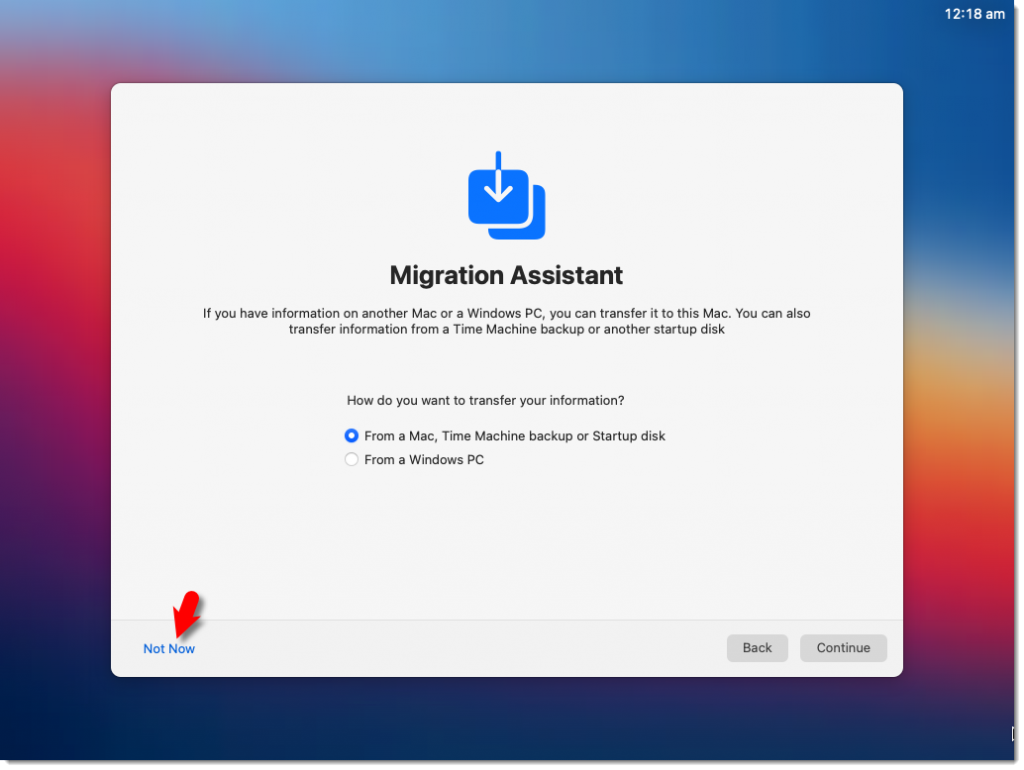
- Now, you can transfer your data from your previous Mac or from your Windows PC. If you don’t want to transfer anything right now, just click the Not Now button to continue.
- Click on Set Up Later then Don’t Sign In. You can add your Apple ID later.
- Click Agree to the Terms and Conditions and click Continue.
- Fill out the Full name, Account name, Password, and Hint then click Continue.
- If you want to customize Express Set Up, you can click on Customize Settings otherwise click on Continue.
- On the Analytics page click Continue.
- On-Screen Time, click Set up Later.
- Select an appearance theme and click Continue. Here you choose your dark mode if you want.
- Wait for a few seconds and you’ll see the login screen now.
- Well done 👍👌😮 you’ve installed macOS Big Sur on VirtualBox Successfully.
Click on the image below to see the full resolution
Summary
Basically, in this article, I’ve shown you the step by step pictorial guide on how to install macOS Big Sur on VirtualBox on Windows computer. After reading and following this guide, you should have done the following;
- Downloaded VirtualBox with its Extension
- Installed VirtualBox on your system
- Installed & upgraded VirtualBox extension
- Created a new virtual machine for macOS Big Sur
- Customized macOS Big Sur VM
- Executed the VirtualBox code to the CMD
- And finally performed a clean installation of macOS Big Sur.
Related: How to install macOS Big Sur on VMware on Windows.
We are ready to keep receiving your feedback about this article, and other posts on wikigain. Your suggestion and feedback are highly appreciated.
Warning: All the content of this site is copyright protected, and no-one has the right to copy-paste our materials.


